What it does:converts the turbos from sequential operation (#1 turbo first, then #1 and #2 together), to parallel operation (both turbos spool up together at the same time).
Why would I want to do this?
- This mod supposedly eliminates blowing up the #2 turbo due to shaft twist when the complex sequential operation doesn't work properly for some reason, especially when you are running higher boost than stock.
- The power delivery is smoother, there is no boost dip at 4000 rpm like there is with the sequential setup. This mod seems to provide more high rpm power (my car now easily loses traction in 2nd gear).
- The sound of the exhaust will increase. Notice how your exhaust note changes at 4000 rpm when your 2nd turbo kicks in? Well, after this mod, your exhaust will have a similar growl throughout the entire rpm range!
What are the drawbacks?Turbo lag is increased at low rpm. The lag is probably too much unless you have a downpipe (but you DO have a downpipe, right?!?) and a manual transmission.
Parts Required:2 one-way check valves (Toyota part number 90917-10049, about $5 each from Jay Marks Toyota), one foot of 1/8" diameter vacuum hose, several feet of picture-hanging wire, flat-blade screwdriver.
Time required:10 minutes (the temporary way), 1-2 hours (the permanent way).
Note:read entire procedure before starting (if you want to permanently wire your actuators open, you canskipdown to that part now).
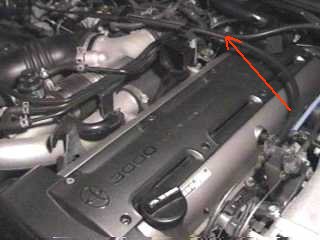
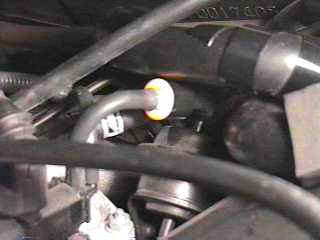
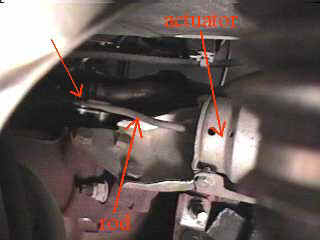
Locate the EGC actuator (about the size of a soda can), on the lower, passenger side of the engine.
Remove the intercooler piping that is just above the air box for easier access.
The hose is just behind the wastegate VSV.
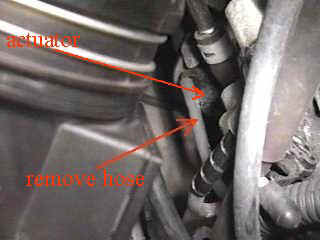
Remove the hose that goes from the top of the EGC actuator to the EGC VSV:
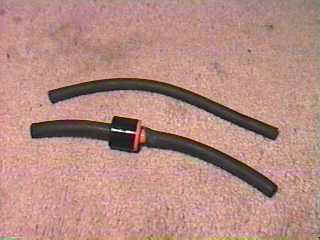
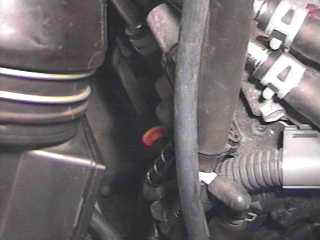
As above, cut the vacuum hose that you bought into two pieces and plug into both ends of the check valve,
matching the length of the stock hose. Install the check valve with the two hoses attached where the original vacuum hose was.
The orange part of the valve faces towards thefrontof the car:
Take the car for a spin. Accelerate moderately to 5000 rpm a few times to make sure everything is working properly.
If you like the new powerband, you need to permantly wire the actuators open. Don't run more than a few days in this configuration, because it's easy for the check valve hoses to pop off (you might want to use hose clamps), closing one valve and leaving the other open, which is not good for the turbos. You will know if this happens if your 2nd turbo doesn't create any boost.
How to wire the actuators open:
Top actuator:
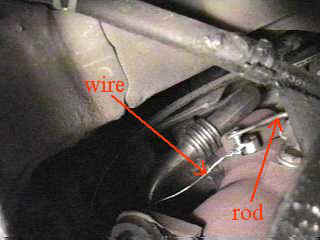
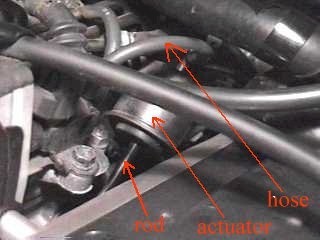
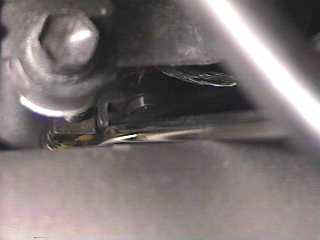
Use a flat-blade screwdriver to push down on the hinge where the bottom of the actuator rod is connected.
Notice how the rod moves downwards, away from the actuator.
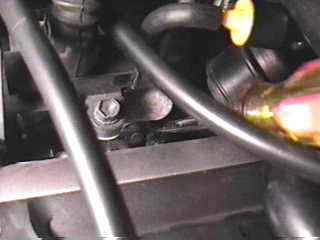
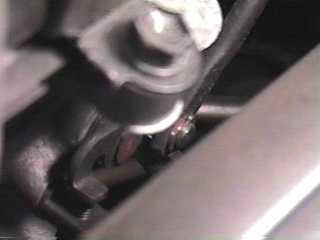
Here is what the actuator looks like:
Remove the c clip at the end of the rod by pushing on both open ends with two screwdrivers.
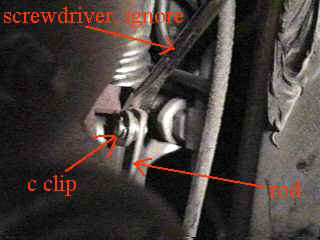
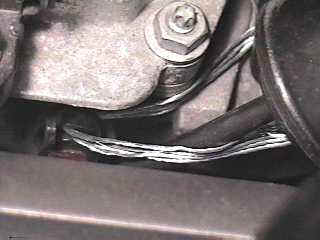
Detach the rod. Tie some wire thru the hole where the rod was previously attached.
Wrap the other end of the wire around something towards therearof the car, pull tight, and secure.